Archive for December, 2012
Ain’t No Party Like a Bookmakin’ Party!
Posted by plgatsimmonsgslis in @ Simmons, Events, PLG Events on December 6, 2012
We had a great turnout for our first DIY bookmaking event last night in P210. Thank you everyone for coming out, and an especially big thanks to Emily Hopkins for leading the workshop and co-chair Brian Shetler for making it happen. The PLG hopes to have another DIY bookmaking workshop in the spring, with some of the kinks worked out. We hope to have another big turnout; even if you came to this first one, stop by again and make another book for yourself or a friend and get to know some fellow GSLIS students as well.
But if you didn’t make it to this last one and think you may not be able to make any future one(s), here are the instructions (thanks again, Emily!):
Bookmaking:
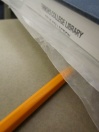
Supplies needed: printer paper, a pile of big books, PVA/wood glue, brush, wax paper, a pencil, bookboard, book cloth, an exacto knife/scissors.
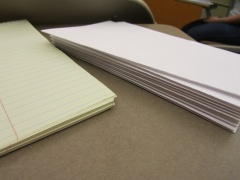
Don’t nest the paper; fold them separately.
Fold each piece of paper in half horizontally.
Stack all your folded pieces of paper (make sure you’re putting them on top of each other and not inside each other) so that the folded edges are all lined up; this will be the spine.
Get your pages and make sure everything’s straight. Secure the edge opposite the spine with two even piles of big books and, using wax paper to ward off glue spillage, feather the spine to the right and the left, gluing as you do. This allows for glue to get in-between the pages, which helps them stick together.
Press the spine together and wipe off the excess glue.
Using wax paper to protect the book, smush the glued pages in the book to solidify the spine.
Using wax paper to ward off glue spillage, leave the pages under the pile of big books until the glue has dried.
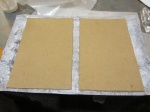
Get book board and, using a pencil, ruler, and an exacto knife/scissors, cut out two rectangles measuring 5 ½ in. by 8 ¾ in. If the spine of your book is thicker than ¼ in., you will also need to cut the book board to make a spine. The spine should be 8 ¾ in. tall and however wide your spine is.
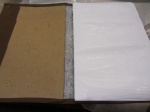
Get book cloth that is large enough to extend 1-2 inches beyond the book when it’s spread open (you can estimate this with an unfolded piece of paper). Trim any excess.
Using wax paper to ward off glue spillage, glue the entire back of the book cloth.
Place the book covers upon the book cloth, after liberally covering it with glue.
Take the book pages and sandwich it in-between the two book boards. Position the book boards so that the edge of the board is not flush with the spine, but is instead about 1/8 in. away from the spine (this room will create a sort of hinge, so you can open the book once you’re done). The other edges of the book board should extend slightly beyond the pages of the book.
Holding the book boards in place, place the book on the book cloth so that the spine is roughly center and then fold the book cloth in half to glue the front book board to it and then unfold it (making sure the board remains attached) and remove the book pages, leaving the book boards.
If your book necessitated a spine cut from book board, get it now and place it on the book cloth in between the two book boards already there.
Using scissors, cut the corners of the book cloth about 1/8 in. away from the edge of the book boards.
Fold the edges of the book cloth around the cover and glue the back of the first page to the board.
Fold the edges of the book cloth over, onto the book boards.
Position the book pages on the back cover so it is in the right place (i.e. the edge of the board is not flush with the spine, but is instead about 1/8 in. away from the spine).
Using wax paper to ward off glue spillage, glue the top end page and then fold the cover over to glue the top end page to the top book board.
Then, flip the book over and repeat with the back.
Smooth out the book cloth making sure there are no air bubbles.
Put the book under the pile of big books and wait for the glue to dry.
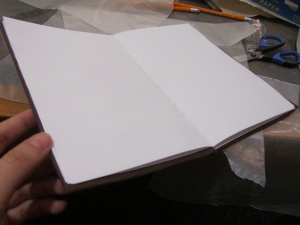
The finished product
We’ll be announcing when the next bookmaking event will take place next semester, so be sure to pay attention to the fliers in the Palace Road building, or hook up with us electronically on our Facebook or Twitter, or right here on our blog. Thanks again for the support!
-
You are currently browsing the archives for December, 2012


